

FlyPath is an open-source QGIS plugin for planning autonomous drone mapping missions and exporting them as native DJI WPML KMZ files, with no conversion tools or third-party apps required.
Define your survey area directly on the map, configure flight parameters, preview the path, and export a ready-to-fly mission file loadable in the DJI Fly app.
Developed and maintained by Dronnix, a drone mapping and geospatial AI company.
FlyPath panel and flight-path preview:


FlyPath supports multi-battery mission splitting. A large survey is divided into separate missions (one per battery), each drawn in its own color on the map and listed in the Layers panel, with a Mission part picker for sending each part to the RC:

Corridor Mapping follows a centre line, adding parallel passes to cover a buffer each side for linear features such as roads, pipelines and rivers:

A walkthrough of installing and using FlyPath in QGIS: defining a survey area, setting flight parameters, previewing the path, and exporting a mission.
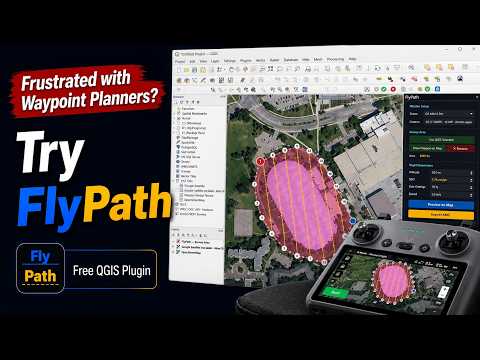


This video was recorded on an earlier release, so some of the interface has changed and newer features (such as multi-battery mission splitting) are not shown, but the core workflow is the same.
- Draw the survey area directly on the QGIS map canvas using a native polygon drawing tool
- Import a survey area from any polygon layer or active QGIS selection
- Two capture modes: Semi-automatic (you set the drone's auto interval capture before takeoff) and Full-automatic (a waypoint per photo with automatic shooting, stop-and-shoot, so no manual interval is needed)
- Configurable flight altitude, speed, side overlap, front overlap, and flight direction
- Straight flight lines with a clean stop at each waypoint, instead of bowing at the line-end turnarounds
- Flight Path choice of Curved or Straight: Curved (the default) matches DJI Fly's native path and survives a re-save or cloud-sync on the controller unchanged, with the lines staying essentially straight at photo spacing and only the turnarounds curving; Straight keeps perfectly straight mapping lines but DJI Fly can reshuffle them if the mission is re-saved on the controller, so pick it only when you will not re-save it there
- Auto-optimised flight direction that minimises flight time for the survey area shape
- Concave-aware flight lines: passes stay inside irregular (L, U, notched) survey areas instead of crossing the excluded gaps
- Optional cross-hatch: fly the grid again perpendicular to the flight direction for better 3D reconstruction and LiDAR point-cloud stability
- Terrain follow (optional): hold a constant height above ground by varying each waypoint's height from free global elevation data (AWS Terrarium DEM, no key). Full-automatic sets a height at every photo; semi-automatic adds waypoints along the flight lines where the ground rises or falls by more than a tolerance you set. Elevation tiles are fetched into memory only and never written to disk. It follows the bare-earth terrain, not trees or buildings, so keep a safe margin. You can also point it at a loaded single-band elevation raster (a DEM) instead of the online data, for more precise or up-to-date heights and for offline field use; the DEM selector sits under the Survey Area and is used by terrain follow, the takeoff zone and the DEM contours alike
- Takeoff Zone (for repeatable mapping): consumer DJI missions fly relative to the takeoff point, so launching from ground at a different elevation than the first waypoint shifts the whole mission's height above ground, and its GSD, on every repeat flight. FlyPath shades the ground you can launch from to keep that constant: within a fixed radius of the first waypoint it highlights the ground whose elevation matches the first waypoint's, within an elevation tolerance you set (shown live as a GSD variance). It is a full circle on flat ground and the matching-elevation part of that circle where the terrain changes, with each split mission drawn in its own tone of purple. A companion overlay draws DEM elevation contours, one line per tolerance step, over the survey area or just the takeoff circles
- Launch height offset: when you take off from something above the ground at the first waypoint (a car roof, a raised platform), enter that height and FlyPath shifts every written waypoint height so the real height above ground still matches the plan, without changing the GSD, overlap or flight lines. It applies to 2D and corridor missions and to every split mission, and defaults to 0 for a normal ground launch
- Corridor mapping (mission type): map linear features such as roads, pipelines, rivers and power lines from a centre line instead of a polygon. Draw, select or edit a line, set a Buffer (the half-width covered each side), and FlyPath adds parallel passes automatically to cover it at the chosen altitude and side overlap, following the line's curves and corners. Waypoints are generated directly from the line for even coverage: one at every vertex in semi-automatic (the camera interval-captures between them) and one per photo in full-automatic. Divide it into flights by line: set Min Flights to split it into contiguous stretches, and/or place Mission Breaks on centre-line vertices (with snap-to-vertex) to force exact boundaries, while the Max Waypoints cap still keeps every mission valid. Terrain follow works with corridors too
- Orbit (3D Model) (mission type): circle an object for 3D modelling. Draw the circle on the map (click for the centre, or press and drag to set the radius), then Edit it with resize handles or Remove it, like a drawn polygon. Set the Radius and Camera Tilt; FlyPath plans one ring of waypoints, each facing the centre, on a curved path. Full-automatic places a photo at every waypoint from the side overlap you set; semi-automatic flies the ring while you interval-capture, with the start and end kept apart by at most one photo spacing. Reverse route flies the ring counterclockwise. Field-test reports are welcome; orbit missions can be saved to and loaded from flypath.io
- Editable GSD linked two-way with altitude, so you can plan by target resolution, with effective photo spacing synced to drone model, speed, and interval
- Live map preview that redraws the flight path as you change parameters, so the route always matches the statistics
- Flight statistics shown in a compact card overlaid on the map next to the flight lines, measured from the actual generated flight path including the turns between lines: distance, coverage, flight-line count, photo count, estimated batteries, and flight time. Battery estimates plan against a 30% reserve, so usable time per battery is 70% of the drone's rated endurance. In full-automatic mode the flight-time and battery estimates also account for the stop at each photo
- Multi-battery mission splitting: divide a large survey into several missions, one per battery, with the split count defaulting to the estimated batteries and editable to any value. Each mission is drawn in its own colour on the preview, and Save to computer writes one KMZ file per mission. Consecutive missions share a seam waypoint, so each mission begins exactly where the previous one ended
- Configurable safety actions: finish action and RC lost action
- Exports native DJI WPML KMZ, compatible with DJI Fly on DJI RC2
- Direct RC export: auto-detects the connected DJI RC (over USB, or as a removable drive), lists the missions DJI Fly tracks, and replaces the one you pick, transferred silently over USB with no prompts or pop-up windows
- Mission preview in the RC picker: every mission on the RC is drawn as a live flight-path thumbnail rendered from its own waypoints and labelled with its waypoint count, so you can see exactly which mission to replace before sending the new one; click a preview to open a zoomable viewer, and the list and preview refresh instantly after each replace
- Local folder export: pick a folder and FlyPath saves a dated
.kmzfile there, then offers to open the folder - FlyPath mission library: open FlyPath and select the My missions tab. The Planner tab opens by default; opening a website mission returns to it and centers the map. Open mission loads a linked working copy; Save changes updates that same website mission. A first save creates a mission and links subsequent saves to it. Save as new… creates a separate mission. If the website changed since loading, saving stops and offers Load latest…, Save as new…, or Cancel; local edits stay intact unless you confirm reloading. Website-only settings are preserved on updates. Reversed 2D routes planned by the shared engine can be loaded and edited; reversed corridor, terrain-follow, and older routes remain website-only. Links last for this plugin session and are cleared on a full planner reset, project close, or account change. Requires a compatible website revision API.
- Saved-route safety: opening a mission preserves its saved route. Missing routes, older Full-auto routes without verified capture actions, and settings adjusted to plugin limits require Regenerate on Map before saving or exporting. Invalid saved planning data is rejected; failed imports preserve the current local mission. Finish or cancel active survey drawing/editing before loading another mission.
- Contextual hints shown in a card on the map, hover over any parameter to see what it does
- Dark-themed dock panel, designed to complement the QGIS interface
| Requirement | Details |
|---|---|
| Operating System | Windows 10 / 11 |
| QGIS | 3.34 or later (4.x supported); tested on 3.34, 3.44.14, and 4.0.3 |
| Python | 3.10+ required by the engine; tested with QGIS Python 3.12 |
| Drone | DJI Mini 3 Pro, Mini 4 Pro, Mini 5 Pro, Air 3, Air 3S, Mavic 3 Classic, Mavic 4 Pro, or Lito X1 |
| Controller | DJI RC2 (for direct USB export) |
This engine release was tested on Windows with QGIS 3.44.14 and verified to load on QGIS 3.34 and 4.0.3. Other QGIS versions and platforms require validation. The engine requires Shapely 2.1+ and pyproj 3.7+.
- In QGIS go to Plugins > Manage and Install Plugins
- Search for FlyPath and click Install Plugin
- Download the latest
FlyPath.zipfrom the Releases page - In QGIS go to Plugins > Manage and Install Plugins > Install from ZIP
- Select the downloaded ZIP and click Install Plugin
git clone https://github.com/dronnix-io/FlyPath.gitCopy the FlyPath folder into your QGIS plugins directory:
Windows: C:\Users\<you>\AppData\Roaming\QGIS\QGIS3\profiles\default\python\plugins\
Then enable it in QGIS via Plugins > Manage and Install Plugins > Installed > FlyPath.
After installation, open FlyPath via:
Plugins > FlyPath > FlyPath
Or click the FlyPath icon in the QGIS toolbar. The plugin opens as a dock panel on the right side of the QGIS window.
Three ways to define your survey polygon:
- Draw on Map: click the button to activate the drawing tool, left-click to place vertices, right-click to finish. Backspace removes the last vertex, Escape cancels.
- Layer / Feature: select any polygon layer and feature already loaded in QGIS.
- Use QGIS Selection: select a polygon feature on the map canvas using QGIS's native selection tools, then click Use QGIS Selection.
Only one polygon can be active at a time. Switching methods automatically removes the previous survey area.
For Corridor Mapping, the survey area is a line instead of a polygon: the same three ways apply (Draw Line on Map, pick a line layer/feature, or Use QGIS Selection on a selected line), and the drawn line can be edited the same way. The read-out shows the corridor Length rather than an area.
| Parameter | Description |
|---|---|
| Mission Type | The kind of mission to plan: 2D Mapping (a grid over a survey polygon), Corridor Mapping (parallel passes along a centre line) or Orbit (3D Model) (one ring around a centre point, facing it). The panel adapts to the chosen type |
| Capture | Semi (you set the drone's interval capture before takeoff) or Full (a waypoint per photo, the drone shoots automatically) |
| Flight Path | Curved (recommended) matches DJI Fly's native path and survives a save or cloud-sync on the controller unchanged; at photo spacing the lines stay essentially straight and only the turnarounds curve. Straight keeps perfectly straight mapping lines, but DJI Fly reconnects the waypoints out of order if the mission is re-saved on the controller, so use it only when you will not re-save there |
| Drone | Sets camera specs used for GSD and spacing calculations |
| Parameter | Description |
|---|---|
| Altitude | Flight altitude above ground level (AGL) in metres |
| GSD | Target ground sampling distance in cm/px, editable and linked two-way with altitude |
| Side Overlap | Cross-track overlap, controls the distance between flight lines |
| Front Overlap | In Full capture: a direct input for the along-track overlap (sets the photo spacing). In Semi capture: a derived read-out of the effective along-track overlap, with the drone's minimum shutter interval shown beside it and a warning if it is too low |
| Speed | Waypoint flight speed in m/s (max varies by drone model) |
| Direction | 2D Mapping only. Angle of flight lines, or click Auto to minimise flight time for the survey shape |
| Margin | 2D Mapping only. Buffer added around the survey polygon boundary in metres |
| Buffer | Corridor Mapping only (replaces Direction/Margin). Corridor half-width: how far to map on each side of the centre line (total width is twice this). The number of parallel passes is derived automatically from this, the altitude and the side overlap |
The gimbal is fixed at nadir (-90 degrees) for 2D and corridor missions. Orbit missions have an adjustable Camera Tilt.
| Parameter | Description |
|---|---|
| Split Missions / Min Flights | Minimum number of separate missions, one per battery; defaults to the estimated batteries. The Max Waypoints cap can raise the actual count above this, never below. In Corridor Mapping this is labelled Min Flights and splits the corridor into that many contiguous stretches along the line (rather than chopping the waypoint route) |
| Max Waypoints | Maximum waypoints per mission (DJI caps a mission at about 200); the mission is split so none exceeds it. Applies to 2D and corridor missions; orbit uses one flight |
| Cross-hatch | 2D Mapping only. Flies the grid and then again perpendicular to the flight direction (double coverage; roughly doubles flight time, photos and battery use) |
| Reverse route | 2D Mapping without terrain follow: starts the mission from the opposite end. Orbit: flies the ring counterclockwise instead of clockwise |
| Set Mission Breaks | Corridor Mapping only. Click centre-line vertices (the cursor snaps to them) to force a mission boundary there; click again to remove it. Breaks combine with Min Flights and Max Waypoints, so you can hand-place exact section boundaries (for example at safe landing points) and still cap each mission |
| Terrain Follow | Optional. Vary each waypoint's height so the drone holds a constant height above ground, using free global elevation data fetched into memory only (never saved to disk). Needs an internet connection while planning, unless you pick a local DEM (below) |
| DEM | Optional, in the Survey Area section, shown when Terrain Follow is on. Sample ground heights from a loaded single-band elevation raster instead of the online data. Leave it on "none" to use the online source. Points outside the selected raster raise a warning rather than producing invalid heights |
| Terrain Tolerance | Semi-automatic terrain follow only. Adds a waypoint whenever the ground has risen or fallen by more than this since the last waypoint. Smaller means tighter terrain following and more waypoints |
| Parameter | Description |
|---|---|
| Finish Action | What the drone does after the last waypoint (Return to Home / Hover / Land) |
| RC Lost Action | What the drone does if RC signal is lost (Return to Home / Hover / Land / Continue) |
Photo triggering: In Semi capture, DJI consumer drones do not trigger from the mission file, so before takeoff manually enable auto interval capture on the drone (its minimum is shown beside Front Overlap). In Full capture, the mission itself triggers a photo at every waypoint, so no manual setup is needed.
GSD and front overlap update live as you adjust parameters.
Click Preview on Map to generate the flight grid and display it on the canvas:
- Deep pink polygon: survey area boundary
- Electric yellow lines: flight path connecting all waypoints
- Electric yellow circles: mid-waypoints
- Red filled circle: start waypoint
- Blue filled circle: end waypoint
When you set Split Missions above 1, each mission's flight path is drawn in its own colour, with its own start and end markers, so you can see how the survey divides across batteries. The missions join at shared seam waypoints where one ends and the next begins.
Waypoint markers are labelled with their number. With Terrain Follow on, each waypoint also carries two values in its attribute table (open the Waypoints layer's attribute table or use Identify): ground_elevation_m (the ground elevation from the DEM) and flight_height_m (the flight height above the launch point, as shown on the RC).
Flight statistics (distance, coverage, flight lines, photos, batteries, flight time) appear in a compact card overlaid on the top-right of the map, next to the flight lines, measured from the actual flight path including the turns between lines. The card is click-through, so it never blocks map interaction. Once a preview is on the map, changing any parameter redraws the path live and recalculates the statistics, so the numbers always match what you see.

The action bar has a Destination selector with two modes: Save to computer and Send to DJI RC. The Export button changes its label to match what it will do.
Use this to save the mission as a .kmz file on your PC or an external drive.
- Set Destination to Save to computer.
- Click Browse… and choose a folder (the folder is remembered for next time).
- Click Export KMZ. A save dialog opens with a dated default filename.
- After saving, FlyPath offers to open the folder.
If Split Missions is above 1, FlyPath writes one file per mission from the name you choose, numbered in order: <name>_1_of_N.kmz, <name>_2_of_N.kmz, and so on.
This replaces an existing mission directly on the DJI RC over USB, with no manual copying or renaming.
Important: FlyPath can only replace a mission that already exists on the RC. It cannot create a brand-new one that appears in the DJI Fly app. To add a mission, create it in DJI Fly first (even a 3-point dummy), then click Auto Detect RC.
Prerequisites:
- Create at least one waypoint mission in DJI Fly on the RC. This is the "slot" FlyPath fills.
- Connect the RC to your PC via USB and enable file transfer on it.
Steps:
- Set Destination to Send to DJI RC.
- Click Auto Detect RC. FlyPath finds the controller whether it is connected over USB (MTP) or shows up as a removable/lettered drive (any drive letter), and lists its missions by date and waypoint count (only missions DJI Fly actually tracks are listed). It identifies the RC by its internal folder structure, not by a drive letter or device name, so it works the same on any computer. The detected waypoint folder is shown in a read-only field so you can confirm the target.
- If it still is not found, click Locate folder manually. This opens a browser of This PC that can reach the RC and any drive (unlike the standard folder dialog, which cannot show MTP devices); navigate to the
waypointfolder and click Select. - If the folder is found but has no missions, FlyPath tells you to create one in DJI Fly first (see the Important note above).
- Pick the mission you want to replace. Each mission shows a preview of its flight path and its waypoint count, rendered from that mission's own waypoints, so you can confirm the right one at a glance; click the preview to open a zoomable viewer. Use the date to match what you see in DJI Fly.
- If Split Missions is above 1, a Mission part picker appears. The RC replaces one mission at a time, so choose which part to send into the selected slot and repeat for each part, filling one RC mission per part.
- Click Replace "…" on RC. FlyPath writes the new mission into the selected UUID folder.
- Disconnect the RC, then close and reopen DJI Fly to see the updated mission.
The replaced mission as it appears in the DJI Fly app on the RC:

| Drone | Waypoint Support | droneEnumValue | Verification |
|---|---|---|---|
| DJI Mini 3 Pro | Yes | 97 | Community-verified |
| DJI Mini 4 Pro | Yes | 68 | Verified from native RC2 mission dump |
| DJI Mini 5 Pro | Yes | 68 | Community-verified |
| DJI Air 3 | Yes | 68 (assumed) | Field-test reports wanted |
| DJI Air 3S | Yes | 68 (assumed) | Field-test reports wanted |
| DJI Mavic 3 Classic | Yes | 68 (assumed) | Field-test reports wanted |
| DJI Mavic 4 Pro | Yes | 68 (assumed) | Field-test reports wanted |
| DJI Lito X1 | Yes | 68 (assumed) | Field-test reports wanted |
Note: DJI Mini 3 (standard) does not support waypoint missions and is not supported by FlyPath. Of the Mavic 3 family, only the single-camera Mavic 3 Classic is supported; the Mavic 3, Mavic 3 Cine and Mavic 3 Pro have multiple cameras and are not yet supported.
Air 3 / Air 3S / Mavic 3 Classic / Mavic 4 Pro / Lito X1: these use the same consumer waypoint enum (
68) as the verified Mini 4 Pro and Mini 5 Pro. If a mission is rejected by DJI Fly on one of these models, please open an issue so we can set a model-specific value. The Air and Mavic 4 are multi-camera, so select the wide/main lens for mapping (the mission file does not force a lens).
FlyPath/
├── flypath.py            # QGIS plugin entry point
├── flypath_dialog.py     # Main UI panel and export logic
├── map_tools.py          # Interactive polygon drawing tool
├── grid_planner.py       # Flight grid generation (QGIS geometry)
├── flypath_engine/       # Generated engine (ignored by Git, bundled in ZIP)
├── wpml/                 # DJI WPML KMZ writers (consumer / enterprise) via a factory
├── hardware/             # Drone registry (drones.json + models)
├── tools/                # Engine refresh, plugin packaging, and repository checks
├── tests/                # Pure-Python unit tests
├── metadata.txt          # QGIS plugin metadata
├── icon.png              # Plugin icon
├── icon.svg              # Plugin icon source
└── docs/
    └── images/           # README screenshots
- Tested and verified on Windows 10 / 11 only, Linux and macOS support is planned for a future release
- Direct RC export requires a DJI RC2 connected via USB with at least one existing mission
- DJI Mini 3 Pro droneEnumValue (
97) is community-verified, not confirmed from a native mission file - 2D grid and corridor (linear) missions support optional terrain follow; Orbit (3D Model) missions use one ring without terrain follow. 3D facade missions are planned for a future release
- Corridor mapping is nadir (-90 degrees) only, like 2D mapping; oblique imagery for vertical structures is planned for a future release. Mission Breaks are placed on the centre line's existing vertices
- Terrain follow uses a bare-earth ~30 m DEM, so it follows the ground, not trees or buildings; keep a safe margin, and it needs an internet connection while planning unless you select a local DEM raster (which also removes the internet dependency). It assumes takeoff at the first waypoint of each exported flight (where the relative heights are referenced)
- Mission splitting divides the survey into whole flight-line groups by battery count; sending split missions to the RC replaces one existing mission slot per part, so create enough slots in DJI Fly first
Contributions are welcome. FlyPath uses a fork and pull request workflow: fork the repository, create a branch, and open a pull request against main. See CONTRIBUTING.md for the full guide, including the checks to run before you push.
For bug reports and feature requests, please use the issue tracker.
You do not need to leave QGIS to reach the project. A links bar sits at the bottom of the FlyPath panel:

From there you can open the GitHub repository, report a bug, request a feature, read the contributing guide and the docs, or visit the FlyPath website. Each link opens in your browser.
This project is licensed under the GNU General Public License v3.0, see the LICENSE file for details.
Dronnix is a drone mapping and geospatial AI company specialising in data collection and analysis for solar panel inspection, agriculture, urban growth monitoring, construction progress tracking, and large-scale mapping missions.
FlyPath is part of Dronnix's open tooling layer, free and open-source to support the drone mapping community.
The project also has a home on the web at flypath.io, a place for guides, supported drones, and news as FlyPath grows. The site is under active development.
Contact: salar@dronnix.com